first of all, may i wish everybody a very Happy 2013 and may this year bring all you hope and wish for, and then some...
i have not posted anything since april 2012, but that doesn t mean i haven t been keeping busy. during the summer months i was making beaded woven bracelets. my son, his girlfriend and many other friends were very supportive, if you get my drift.
when classes started again in september, i was able to make a few little silver things that were different from what i d been making before because they were smaller than i am used to making... i tend to go for rather big things, me being a big girl myself... (haha, that was me trying to be funny by the way).
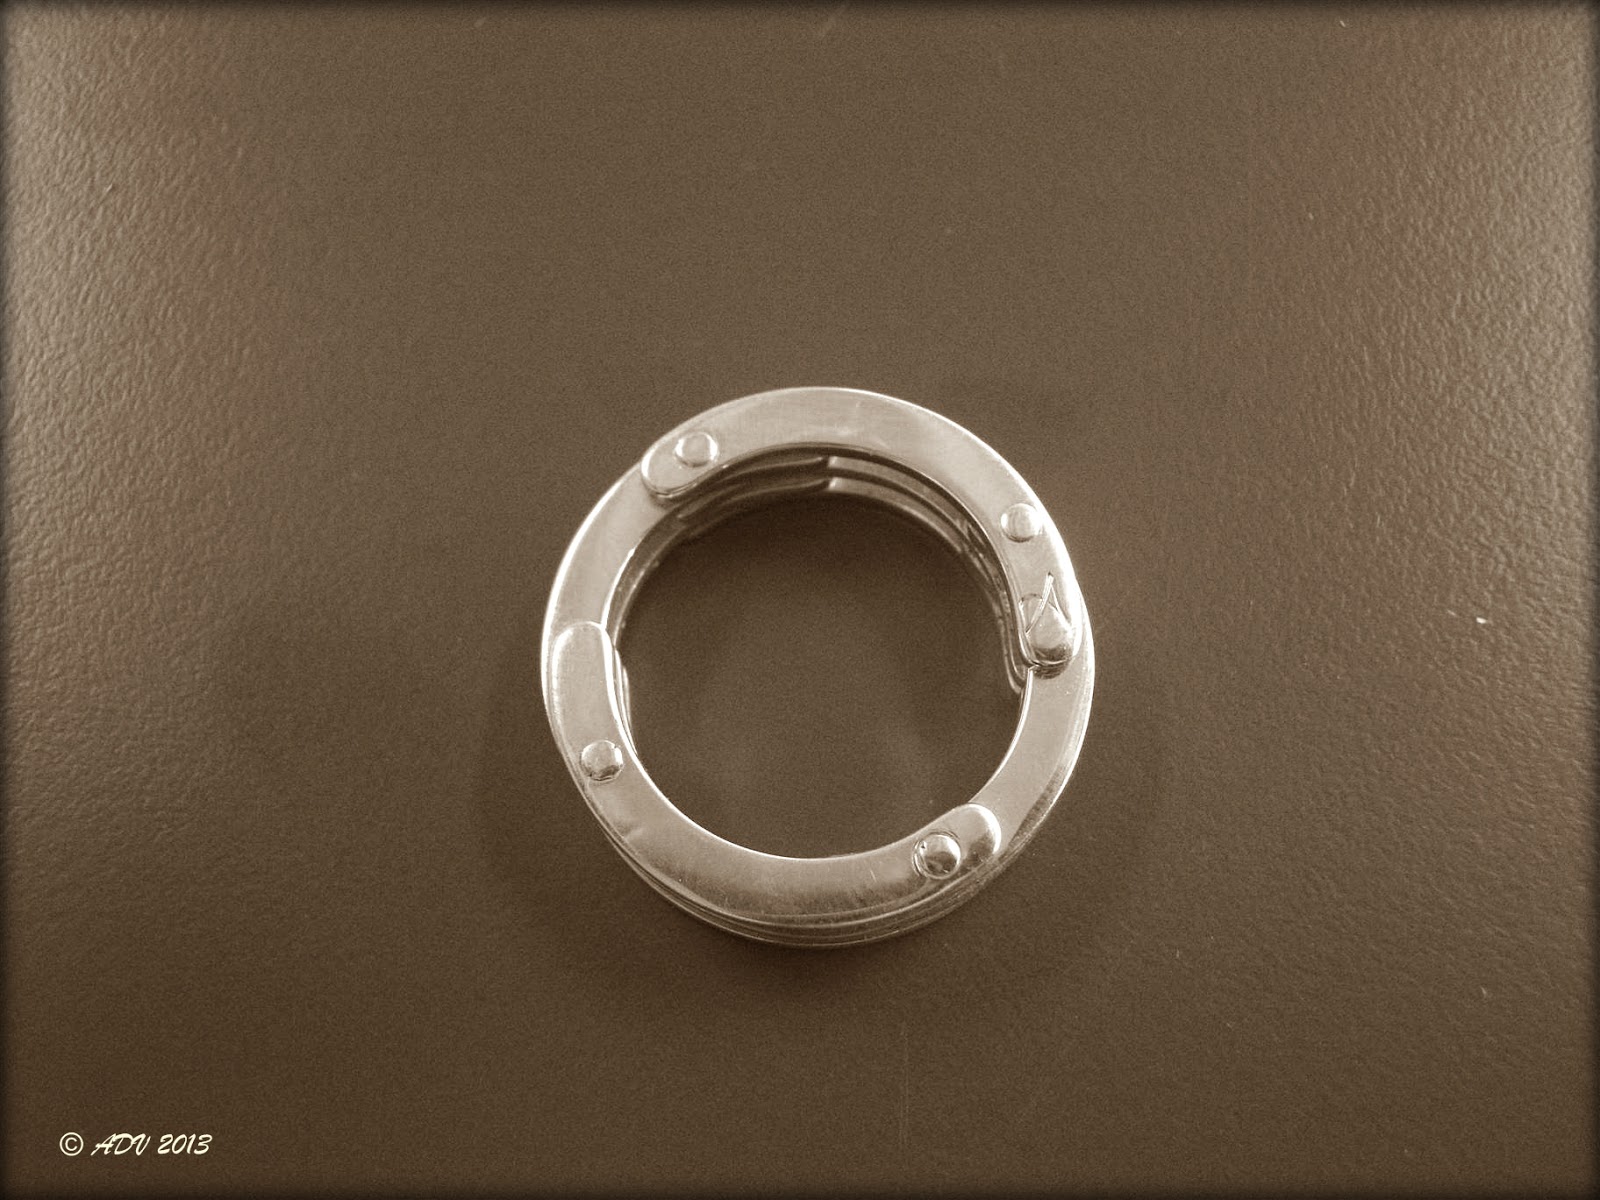
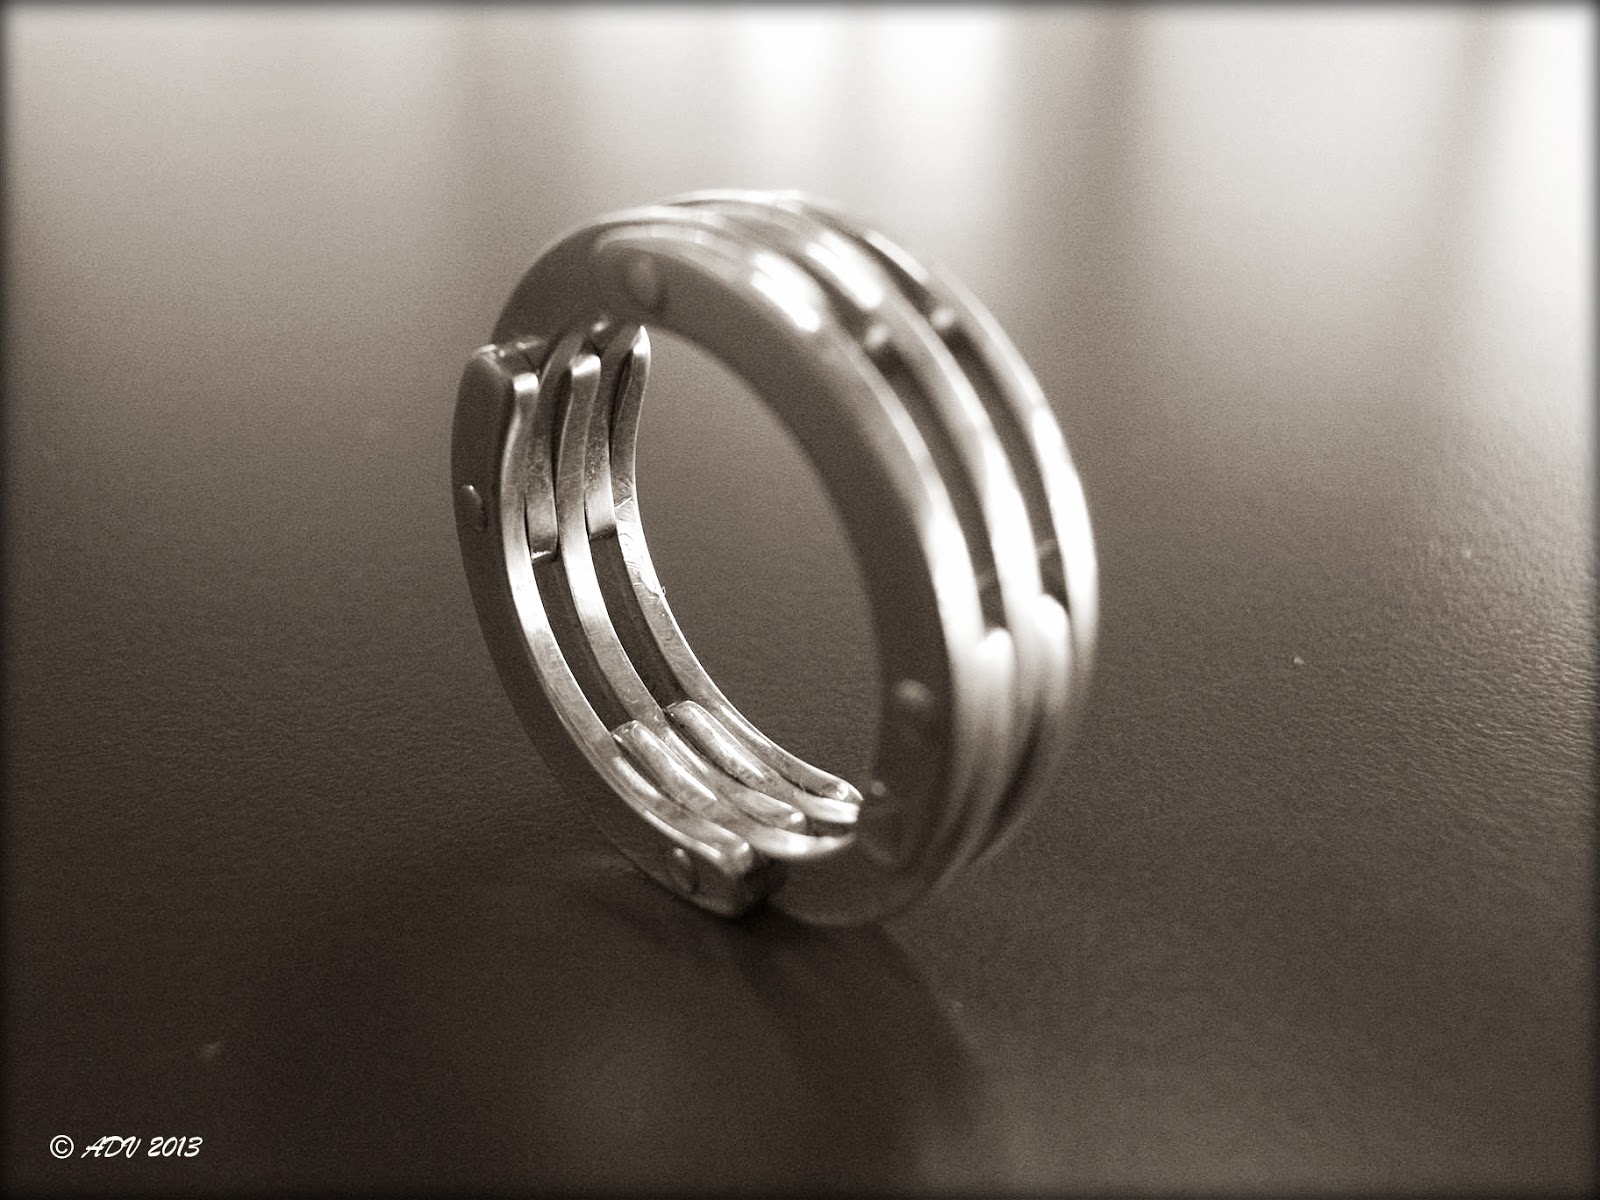
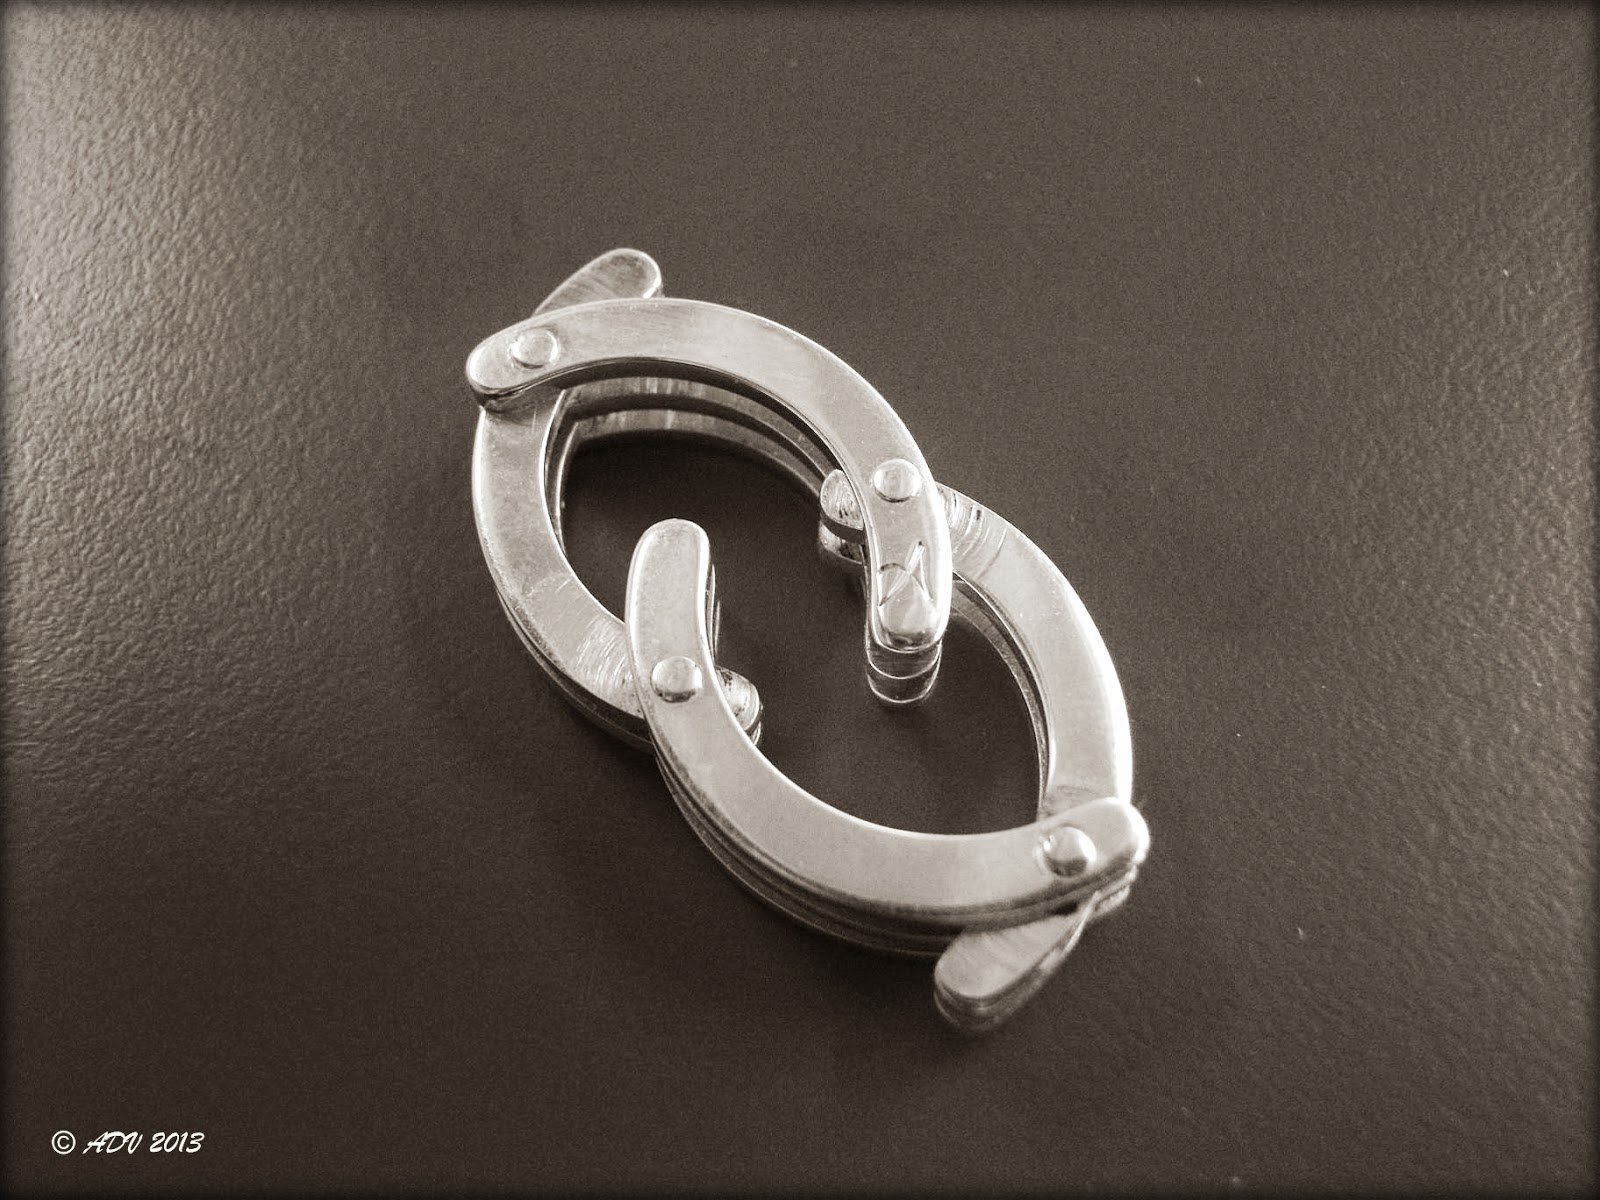
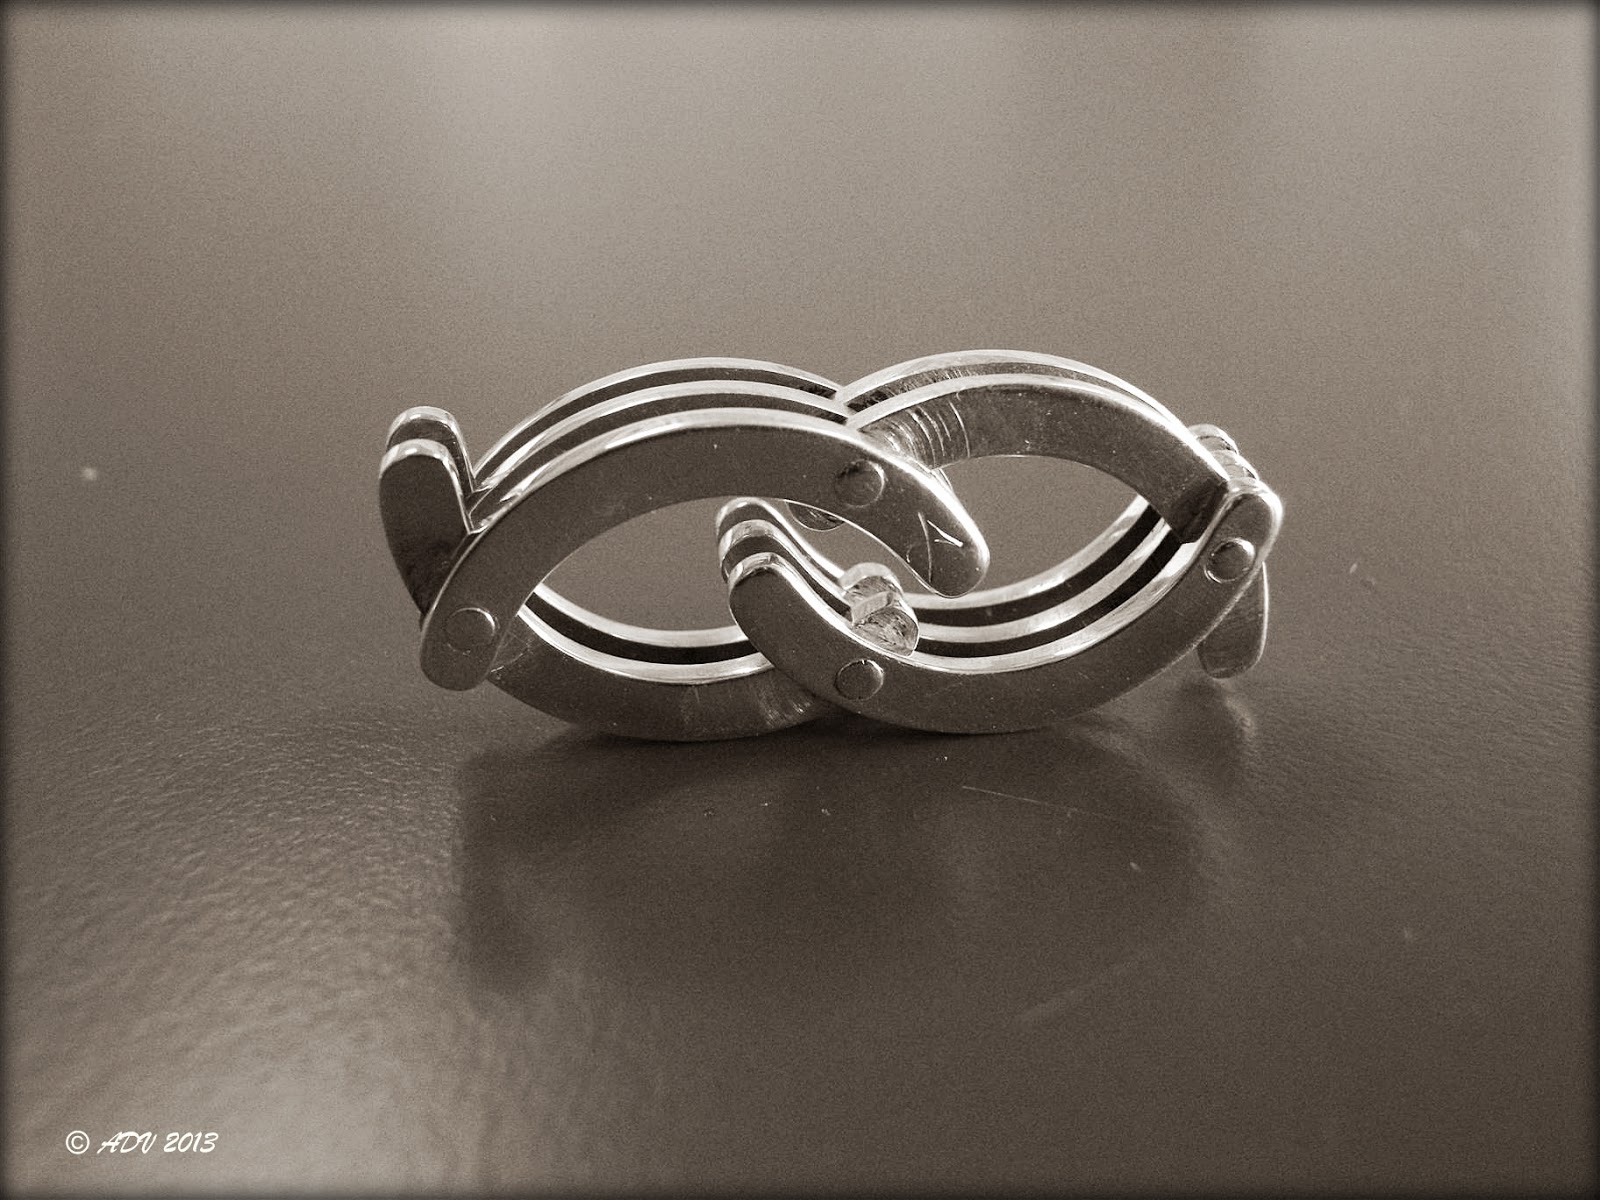
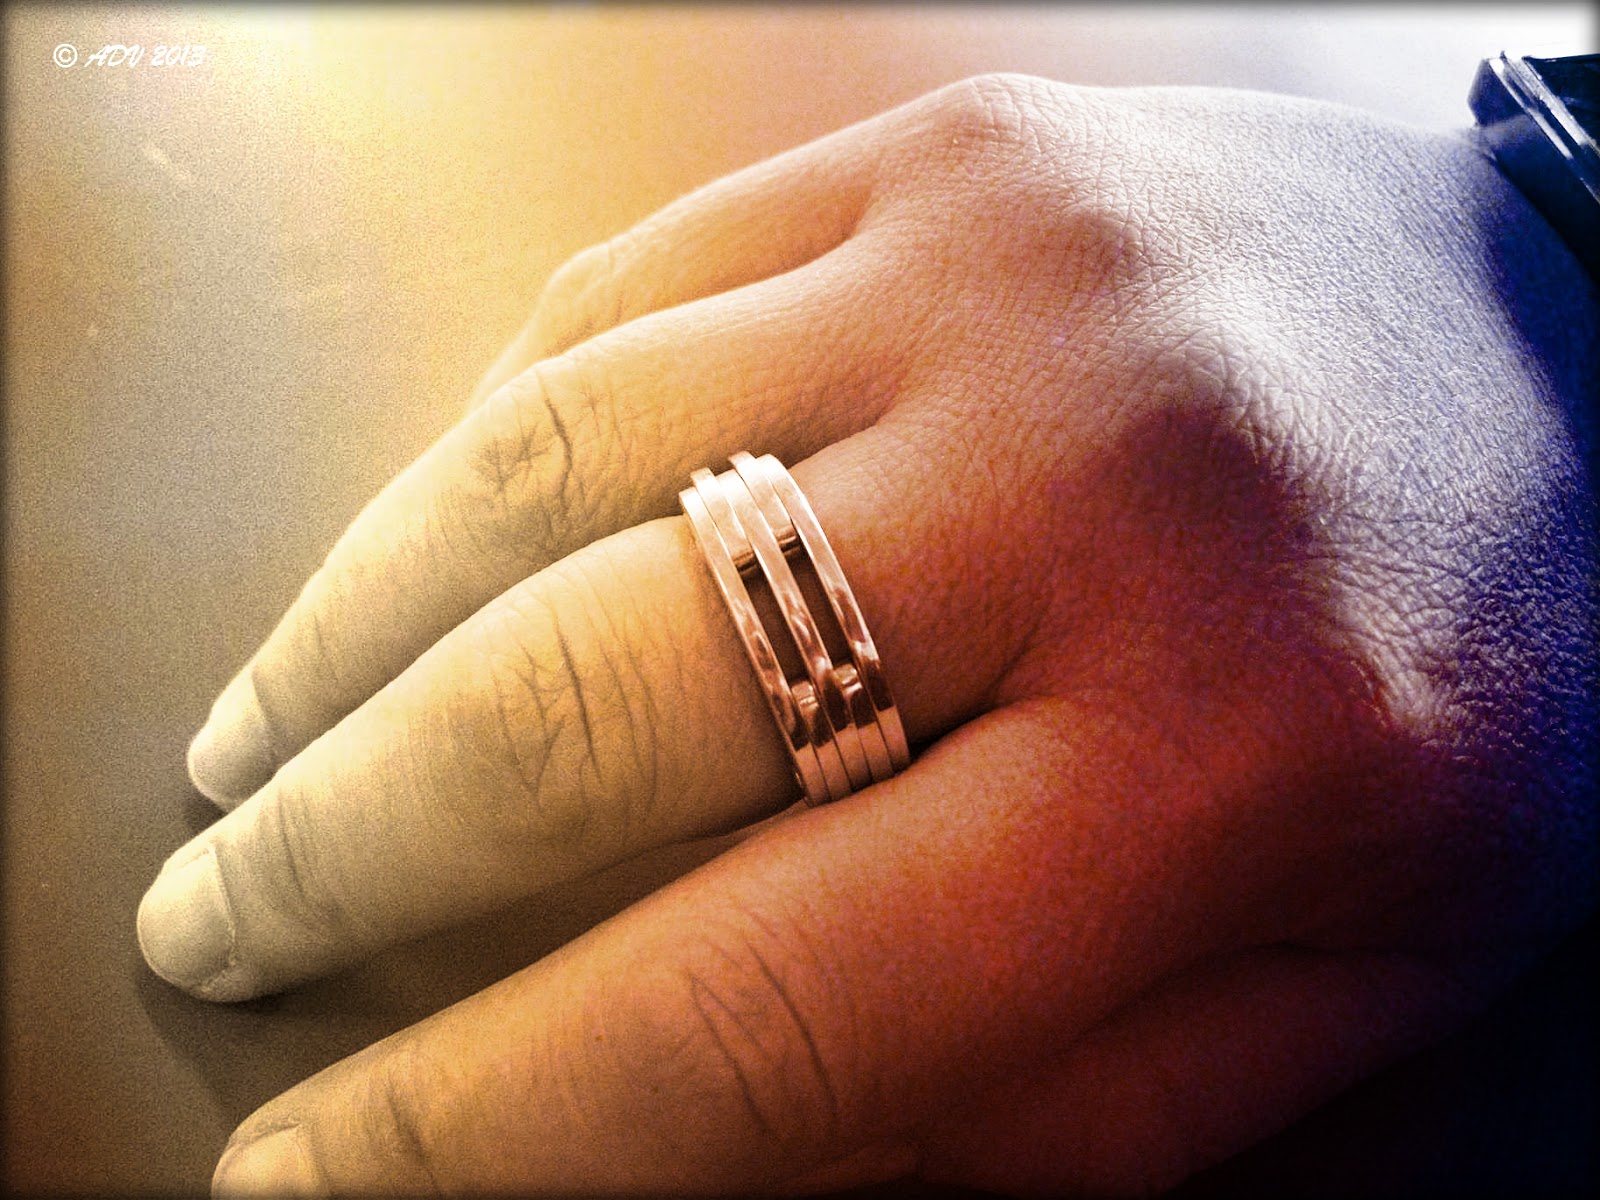
aaaanyway, my main project was again another challenge... making a ring without soldering but only using rivets to keep it all together...what they call in the trade: 'cold connection'.
i was inspired to make this one based on a machine-made steel ring that one of my colleagues at my day job wears (he s all into industrial engineering) and it just fit the bill. i had to try and make that in silver!
but steel is so much stronger! so i had to make a few adjustments: 800/1000 silver instead of 925/1000, thicker plate and thick enough rivets... this way my hand-made ring will, hopefully, be strong enough to withstand the wear and tear of time...
so, this is not my original design, but a project to see whether i could work out how to make all the little parts into one whole. and i thank my teachers Mich Larivière and Joris Faes, as well as my colleague Peter, for their support and advice during the process.
adventures, or trials and tribulations, of a fulltime working mom, expanding on self-confidence, happiness... living! thus... venturing out into the grand world of handcrafted jewellery and beadwork
Showing posts with label rings. Show all posts
Sunday, 13 January 2013
Sunday, 13 November 2011
freeze frame
some time ago i made a square ring.
there s a long story behind that, which i m not going to divulge here...
well, actually, yes, i am.
why?
because i made that square ring as a challenge.
during the summer we visited a market where young, as yet 'unknown', entrepreneurs were selling their products/wares... and most were either jewellers or fashion designers, but one jeweller s work jumped out at me.
now, before i go on, you must know, at the school where i m following my goldsmithing course, we are encouraged to share ideas and techniques. and, come on, ever since the first man or woman decided to hang a wild animal tooth on a leather string around his/her neck as a talisman or just to show off, humankind has been making things to beautify, to mystify, to show off wealth... and when a new concept, or a new technique was discovered, everybody was free to elaborate and make something better or more beautiful or useful...
anyway, so this jeweller s work stood out. it was a square ring, and i was intrigued. i loved that it fit snugly and comfortably, and i asked him how he had done it.
me and my mouth.
i won t even write what his girlfriend said.
on my way home i was already thinking how i could make one. and the next day i did.
using my bench-vice, i pulled and folded the strip of silver, turned it, pulled it again into a 90° corner, soldered, sanded and polished the thing, and it worked.
so there.
but then i found me a square mandrel! YES!
perfect corners.
freeze frame
best of all is not the fact that i now know i can make a square ring.
best is that i know there are other people, like my classmates, who enjoy making new pieces and discovering new techniques, and who don t mind at all about sharing ideas.
like this one; you might think this ring has been hammered, but it hasn t. oh yes, i did start out by hammering, but the effect was almost unnoticeable, because the metal would tend to spread out more and if i had continued, the ring would have become wider and thinner, which wasn t the objective.
so my teacher showed me how to get that hammered effect, by using a very small round burr and a very tiny sanding wheel...
time to test that technique out on something else now, hmmmm.
there s a long story behind that, which i m not going to divulge here...
well, actually, yes, i am.
why?
because i made that square ring as a challenge.
during the summer we visited a market where young, as yet 'unknown', entrepreneurs were selling their products/wares... and most were either jewellers or fashion designers, but one jeweller s work jumped out at me.
now, before i go on, you must know, at the school where i m following my goldsmithing course, we are encouraged to share ideas and techniques. and, come on, ever since the first man or woman decided to hang a wild animal tooth on a leather string around his/her neck as a talisman or just to show off, humankind has been making things to beautify, to mystify, to show off wealth... and when a new concept, or a new technique was discovered, everybody was free to elaborate and make something better or more beautiful or useful...
anyway, so this jeweller s work stood out. it was a square ring, and i was intrigued. i loved that it fit snugly and comfortably, and i asked him how he had done it.
me and my mouth.
i won t even write what his girlfriend said.
on my way home i was already thinking how i could make one. and the next day i did.
using my bench-vice, i pulled and folded the strip of silver, turned it, pulled it again into a 90° corner, soldered, sanded and polished the thing, and it worked.
so there.
but then i found me a square mandrel! YES!
perfect corners.
freeze frame
best of all is not the fact that i now know i can make a square ring.
best is that i know there are other people, like my classmates, who enjoy making new pieces and discovering new techniques, and who don t mind at all about sharing ideas.
like this one; you might think this ring has been hammered, but it hasn t. oh yes, i did start out by hammering, but the effect was almost unnoticeable, because the metal would tend to spread out more and if i had continued, the ring would have become wider and thinner, which wasn t the objective.
so my teacher showed me how to get that hammered effect, by using a very small round burr and a very tiny sanding wheel...
time to test that technique out on something else now, hmmmm.
Thursday, 6 October 2011
message on a scroll... ?
i have finally found the courage to start using a bit of gold in my work. not much, mind you, and (unfortunately) not even new gold.
somewhere in the back of my jewellery box i still had a gold ring from way back when, but i never wore it, well not often enough. so why not? melt it i mean. make something new and wearable out of it, combine it with silver, give it a little something extra, like a ray of light on the moon (jeez, that just sounds corny, but i m gonna say it anyway, there s a crazy poet inside me too)
i also like the idea of something symbolic, little messages on the inside of a piece of jewellery, not to be seen by anyone but the owner who knows it s there.
i had seen something similar to this piece in a magazine some time ago, tried to figure out how it could ve been made and came up with this:
a ribbon of silver, rolled up, kept together with a golden band.
now, how many turns should i give this?
7, nice, but too thick
here s that old gold ring, melted and pulled
then made into half-round wire
hmmm, now to solder that together (which was loads easier than soldering silver, wow!)
mattified the silver ring
after a final polish and clean
this prototype has no message except for the one in my head... but there could ve been, yes?
somewhere in the back of my jewellery box i still had a gold ring from way back when, but i never wore it, well not often enough. so why not? melt it i mean. make something new and wearable out of it, combine it with silver, give it a little something extra, like a ray of light on the moon (jeez, that just sounds corny, but i m gonna say it anyway, there s a crazy poet inside me too)
i also like the idea of something symbolic, little messages on the inside of a piece of jewellery, not to be seen by anyone but the owner who knows it s there.
i had seen something similar to this piece in a magazine some time ago, tried to figure out how it could ve been made and came up with this:
a ribbon of silver, rolled up, kept together with a golden band.
now, how many turns should i give this?
7, nice, but too thick
here s that old gold ring, melted and pulled
then made into half-round wire
hmmm, now to solder that together (which was loads easier than soldering silver, wow!)
mattified the silver ring
after a final polish and clean
this prototype has no message except for the one in my head... but there could ve been, yes?
Monday, 13 June 2011
a hollow ring bis
two weeks ago, with a lot of help from both my teachers, Ms. Lariviére and Mr. Faes, i was able to finish the third and last school project: a hollow ring. actually, it was an excercise on forming and soldering different plates to make one piece of jewellery.
sawing the different plates and soldering them together was not so much of a problem as was the actual forming and shaping them to make one whole.
i started by making a basic ring and a larger one which had to be then shaped to form the top the final work as you can see in my earlier post.
and then i tried to keep track of the process by also taking pictures:
and here s a short video of Mr. Faes helping me to shape the top part of the ring.
it s turned out to be a very striking piece, if i may say so myself, but i m not quite sure yet if i ll be making this one again...
yesterday i went to a little market downtown, where beginning jewellers and artists showed some of their work. some of it was quite inspiring, and at the moment, i know that, instead of sitting here behind my laptop, i should be at my workbench!
and since our course finished last wednesday, i will have time now to work out some new ideas (must admit tho, i will miss the ambiance of the classroom, even if it is only for a few months). still... YAY!
sawing the different plates and soldering them together was not so much of a problem as was the actual forming and shaping them to make one whole.
i started by making a basic ring and a larger one which had to be then shaped to form the top the final work as you can see in my earlier post.
and then i tried to keep track of the process by also taking pictures:
and here s a short video of Mr. Faes helping me to shape the top part of the ring.
it s turned out to be a very striking piece, if i may say so myself, but i m not quite sure yet if i ll be making this one again...
yesterday i went to a little market downtown, where beginning jewellers and artists showed some of their work. some of it was quite inspiring, and at the moment, i know that, instead of sitting here behind my laptop, i should be at my workbench!
and since our course finished last wednesday, i will have time now to work out some new ideas (must admit tho, i will miss the ambiance of the classroom, even if it is only for a few months). still... YAY!
Thursday, 3 February 2011
project nr 2
and here it is then, project nr 2 for school, the entourage ring is finally finished!
it took me some time to choose the stones. at first i thought i might go for purple amethysts or red garnets... but then i wanted skyblue aquamarines. once i got to the shop though, i saw this blue-green beryl and i was sold.
i don t want to ever take this ring off again, but our next and last project is coming up, also a ring set with a stone, and perhaps easier to wear on a daily basis... oh well, we ll see!
i like to wear it casual like this...
Wednesday, 26 January 2011
what an exercise!
i m almost there! project nr 2, the entourage is nearly finished, i just have to polish the thing, and then i can give it to my teacher, Mr. Faes, for setting! can t wait...
the middle prongs first
cleaning up the back
the first outside prongs form the base and the height of the entourage
phew, that worked out ok
all prongs soldered
now for the ring
will they stay together? taking a risk here
all soldered and pickled
after a first polish in the tumbler
ps. got our midterm results: 87.5%... now i m gloating!
the middle prongs first
cleaning up the back
the first outside prongs form the base and the height of the entourage
phew, that worked out ok
all prongs soldered
now for the ring
will they stay together? taking a risk here
all soldered and pickled
after a first polish in the tumbler
ps. got our midterm results: 87.5%... now i m gloating!
Subscribe to:
Posts (Atom)